Smart Ceiling Lighting: Why Your Ceiling's Structure Should Decide the Plan, Not Your Style
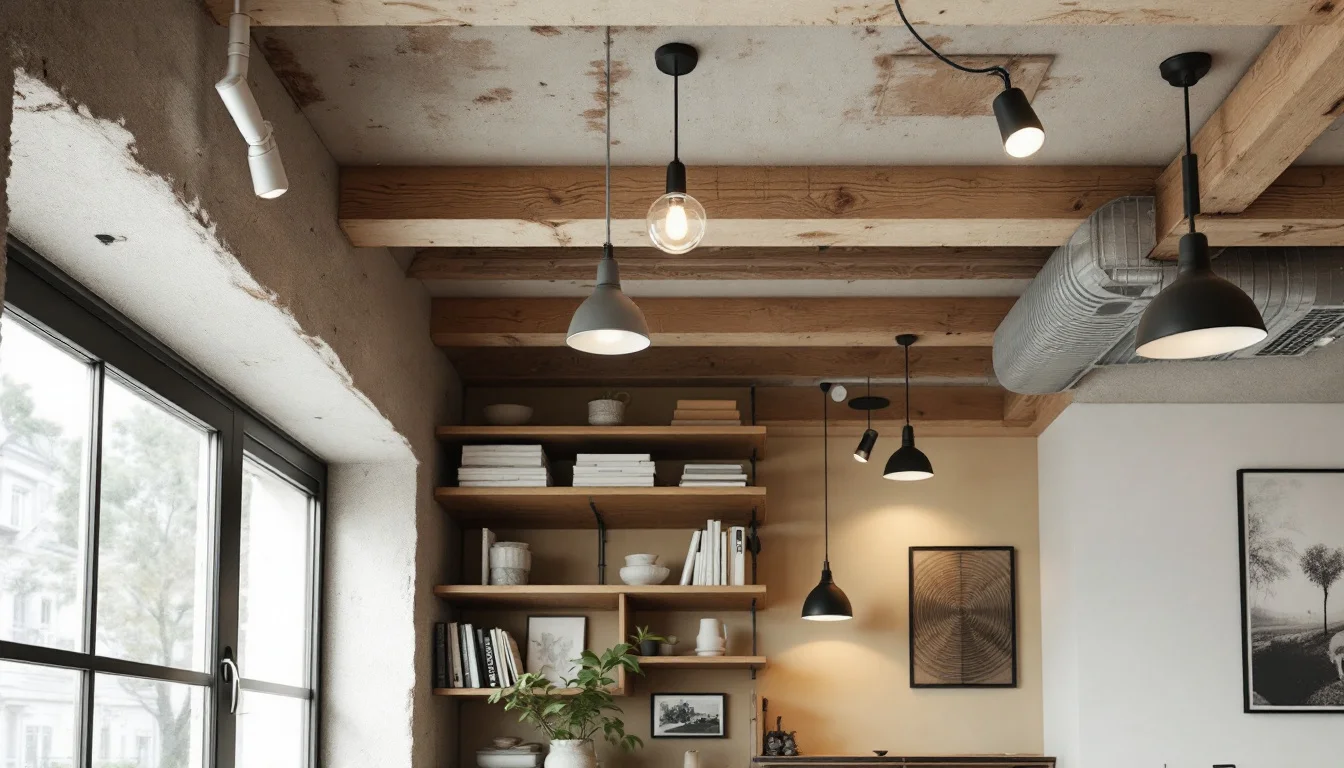
Most ceiling lighting projects start the same way: a photo on a phone, a preference for recessed downlights, a vague idea that warm white feels cosier than cool white. Then someone opens the ceiling and the plan changes. The material above a room, the way it was built, and what is already running through it decide far more than any style choice ever will. A plasterer working on a century-old ceiling faces a different job than an electrician drilling into a concrete slab, and no amount of taste settles that difference. The practical way to plan ceiling lighting is backwards: start with what the ceiling allows, then pick the fixture, and only at the end choose how the light should feel.
Key Takeaways
- The biggest cost factors in a recessed lighting job are the ceiling type, whether there is attic or cavity access, the insulation above it, and the state of the existing wiring — not the fixture brand or finish.
- In a pricing guide from a Northern Virginia electrical contractor in the United States, retrofitting recessed lights into a finished ceiling costs $150–$300 per light, against $100–$175 per light when the same lights go in during new construction with open framing. Treat these as a US benchmark, not a Belgian or Western European price.
- Adding recessed lights usually means either running a new dedicated circuit from the panel or tapping an existing lighting circuit that has spare capacity — a question worth answering before any fixture is chosen.
- The choice between recessed and surface-mounted fittings is rarely a whole-house decision. It is usually settled room by room, and often ends up as a mix of both.
What your ceiling decides before you do
Before a single fixture gets chosen, the ceiling itself sets the boundaries of what is possible. Ceiling type, attic access, insulation and the state of the existing wiring are consistently flagged as the biggest cost drivers in a recessed lighting installation — well ahead of the fixture itself.
Ceiling material changes the job
Not every ceiling takes a hole the same way:- Standard drywall is the easiest and cheapest surface to cut and patch.
- Plaster ceilings are harder to cut cleanly and can crumble at the edges, which means extra repair work after the electrician leaves.
- Vaulted ceilings need angled trims to sit flush and often require scaffolding to reach safely.
- Concrete ceilings need core drilling, which is slower and typically pushes the cost up.
Access above the ceiling matters as much as the material
Where there is no attic above a ceiling, wires have to be fished through enclosed cavities using flexible drill bits and fish tape rather than run openly across joists. A first-floor ceiling sitting beneath a finished second floor is consistently harder and costlier to wire than a top-floor ceiling with an open, unfinished attic above it, simply because there is nowhere to work from.Insulation and wet rooms add their own conditions
Fixtures installed into insulated ceilings generally need to be rated for direct contact with insulation to avoid a fire risk, and where attics have loose, blown-in insulation, an electrician typically has to clear it back around each fixture point before fitting it — a step that adds time to the job. Bathrooms carry their own conditions too: fittings close to showers or baths are generally expected to be rated for damp or wet locations, and the circuit is typically required to have additional protection such as GFCI (common in the US) or an RCD (common in Europe). These are both points worth raising with a locally licensed electrician against the wiring rules that apply where you live, since the detail above reflects practice reported in one US source rather than a universal standard.Circuit capacity is the last structural check
A new run of recessed lights needs either a dedicated circuit from the panel or an existing lighting circuit with spare capacity; a full panel means a new breaker or a panel upgrade has to be priced in. LED fixtures make this easier than it used to be: at a typical draw of roughly 10–15 watts each, a single 15-amp, 120-volt circuit (rated for about 1,440 watts of continuous load) can carry well over 80 LED recessed lights before reaching its rated capacity, which is usually enough for several rooms before circuit capacity becomes the constraint.Recessed or surface-mounted: the trade-off once the constraints are cleared
Once the ceiling has ruled out or confirmed what is feasible, the choice between recessed and surface-mounted lighting comes down to disruption, cost and how much visual weight you want on the ceiling.
A recessed light sits inside the ceiling, with most of the fixture hidden above the surface. That keeps the ceiling visually quiet, which matters most in rooms with modest ceiling height where a protruding fitting would be noticed. A surface-mounted or semi-flush ceiling light stays visible below the ceiling line instead. It is generally easier to install, easier to swap out later, and a single fitting can spread light more broadly than several small recessed points.
That trade-off becomes practical rather than aesthetic in rooms where the ceiling is already tight. A Singapore lighting retailer's guide notes that a slim surface-mounted fixture is "the practical answer when no false ceiling is being built or when slab-to-finish height is already tight," since it can deliver good coverage from a single existing lighting point with less disruption and lower cost than rewiring a room for multiple recessed fittings.
None of this makes recessed lighting automatically superior where it is feasible. Its quality depends entirely on planning: poor spacing leaves patchy pools of light, the wrong beam angle leaves walls dark, and low-quality fittings can flicker, render colour poorly, or leave uneven trims. A recessed layout done without a plan can end up looking worse than a single well-chosen surface fitting. For most homes, the decision is not made once for the whole house — it is made room by room, and the result is often a mix of both fixture types rather than a single rule applied everywhere.
What it costs, room by room
Once the structural questions are answered and the fixture type is chosen, budgeting becomes a matter of room size and light count. The figures below come from a pricing guide published by a Northern Virginia electrical contractor in the United States, covering recessed lighting installation including labour. They are a useful order-of-magnitude reference for comparing rooms against each other — not a price list that applies directly in Belgium or elsewhere in Western Europe, where labour costs and electrical practice differ.
| Room | Typical light count | Reported installed cost (US benchmark) |
|---|---|---|
| Kitchen | 6–9 lights | $1,000–$2,500 |
| Living room | 4–6 lights | $700–$1,500 |
| Basement | 8–12 lights | $1,200–$3,000 |
| Bedroom | 4 lights | $500–$1,000 |
| Bathroom | 2–4 lights | $400–$900 |
| Hallway | 2–4 lights | $300–$700 |
Two patterns stand out. First, cost scales with light count more than with room type on its own — a basement with 8–12 points costs more than a kitchen with fewer, larger fittings, purely because of the number of holes being cut and wired. Second, these figures bundle labour and access difficulty together with the fixture, which is why the same room can land anywhere across a wide range depending on the ceiling behind it.
The fixture itself is a separate, smaller line. LED recessed fixtures typically cost $20–$60 per light: standard 6-inch LED retrofit kits run $20–$35, while premium fixtures with adjustable colour temperature and higher colour rendering sit at $40–$60. Labour, not the fixture, is usually what moves a budget from one end of the room range to the other.
Retrofit vs. new construction: what the timing actually costs
The same pricing guide gives two separate per-light rates depending on timing: $100–$175 per light when recessed lights go in during new construction with open framing, against $150–$300 per light when the identical lights are retrofitted into a finished ceiling.
Applied to a typical 6-light kitchen, the gap becomes concrete:
- New construction, open framing: 6 lights × $100–$175 = $600–$1,050
- Retrofit through a finished ceiling: 6 lights × $150–$300 = $900–$1,800
The lesson is not that retrofits are a bad idea — plenty of ceilings are only ever touched once a house is already built and lived in. It is that timing has a real, calculable cost, and that cost is driven entirely by the same structural factor already covered: whether the framing is open and accessible, or buried behind a finished surface. This gap is specific to the US pricing guide already cited above and isn't a figure to quote directly against a Belgian job.
Layering light after the structure is fixed: colour temperature and dimming
Only once the ceiling's constraints are settled and the fixture type is chosen do colour temperature and control become a meaningful decision — and even then, it is the layer that is easiest to change later.
The same US pricing guide reports that in its market, most homeowners prefer 2700K warm white for living spaces and bedrooms, 3000K soft white for kitchens and bathrooms, and 3500K–4000K neutral to cool white for workshops and laundry rooms. That is a reported preference in one market rather than a rule to copy directly, but it is a reasonable starting point for matching colour temperature to how a room is used: warmer for relaxing, cooler for tasks that need visual clarity. Many premium LED fixtures today offer selectable colour temperature, so the decision no longer has to be locked in at the point of installation.
Control is the other layer. A standard dimmer switch adds $50–$150 to a recessed lighting job, while smart dimmers from brands such as Lutron Caseta and Leviton Decora Smart add $80–$150 per switch and connect to home automation systems including Alexa, Google Assistant and Apple HomeKit for scheduling and scene creation. Dimmable LED fixtures extend what a single light can do, from bright task lighting while cooking to soft ambient light in the evening — but fixture and dimmer compatibility has to be checked before buying either one, since not every LED driver dims smoothly with every switch.
A decision sequence: structure, then fixture, then style
The constraints and choices above can be put in a working order. This is a sequence worth following in this order before calling an electrician for a quote, not a formal standard — just a practical checklist built from the structural and fixture facts already covered.
- Ceiling material. Confirm whether the ceiling is drywall, plaster, vaulted, or concrete — this alone changes which fittings are realistic and roughly how much labour to expect.
- Attic or cavity access. Check whether there is open access above the ceiling or whether wires will need to be fished through an enclosed cavity.
- Insulation and fixture rating. Where the ceiling is insulated, confirm with a licensed electrician whether the fittings need to be rated for insulation contact, and whether any room (such as a bathroom) has extra conditions to meet.
- Panel and circuit capacity. Establish whether an existing circuit has spare capacity or whether a new dedicated circuit, breaker, or panel upgrade needs to be priced in.
- Fixture type, room by room. Only now choose between recessed and surface-mounted lighting for each room.
- Colour temperature and control. Last, choose warm, neutral or cool white and whether to add a dimmer or smart control, since this layer is the easiest to adjust or upgrade after installation.
Frequently Asked Questions
Can I upgrade existing recessed cans to LED without rewiring? Where recessed cans with incandescent or screw-in CFL bulbs already exist, LED retrofit kits costing roughly $20–$35 per light can usually be snapped into the existing housing with no rewiring involved. Cans with pin-based CFLs wired through an integrated ballast are the exception: the ballast typically needs to be removed or bypassed, which does involve some rewiring unless the retrofit kit is specifically designed to work with it. For standard screw-in sockets, though, this is the lowest-disruption upgrade path available and does not require revisiting any of the structural questions above, since the housing and circuit are already in place.
How far apart should recessed lights be spaced? For 6-inch recessed lights, a spacing of roughly 4–6 feet (about 1.2–1.8 metres) between fittings and 2–3 feet (about 0.6–0.9 metres) from walls is generally recommended, ideally worked out on a layout plan before installation day rather than decided fixture by fixture on site.
Will any dimmer work with LED fixtures? Not automatically. Dimmable LED fixtures broaden what a room can do with one set of lights, but the dimmer and the fixture's driver need to be confirmed as compatible before purchase — mismatched pairs can flicker, buzz, or fail to dim smoothly even when both components are individually marketed as dimmable.
Conclusion
Fixtures with selectable colour temperature and app-based dimming are increasingly common, which means the style layer of a ceiling lighting project — warm or cool, dimmed or not, scheduled or manual — is becoming something that can be changed long after installation day. The ceiling material, the access above it, and the circuit feeding it cannot be revisited so easily once the plaster is patched and the wiring is closed up. That makes the structural layer the one decision in the entire project worth getting right the first time.